Monthly Archives: September 2009

Post Holiday Round Up

Well I have crossed Europe and back again. I’ve eaten some good food, some excellent food, some indifferent food and some bloody awful food but all in all a good time was had by my stomach. 

We crossed several regions of France, German speaking Switzerland and Northern Italy and back again so a real cross section of food on this trip.  On one day we had breakfast in Italy, Lunch in Switzerland and Dinner in France.  I have to say that was probably my favourite day because I had Brioche for breakfast, which is a sort of breadier Italian croissant.  Then came vienna sausages and chips for lunch, which in England would have been awful but they were proper german sausages with bite and continental chips always taste better than their English counterpart, we just can’t make proper french fries! 

Wurst und Pommes

And finally in Alsacian France I had my dinner, which started with a glass of cremmant d’Alsace and a warm tarte d’oignons.  

Tarte D'Oignons Cremmant D'Alsace

Then came a main course of what the menu translated as meatballs with a mushroom sauce served with roast potatoes.  In no way did that description do it justice.  Visually it wasn’t much to look at but, frankly, German food never is that tempting visually, the taste, however, was sublime!  The meatballs were huge, hearty and full of flavour and the mushroom sauce was a delicious forestière sauce full of weird and wonderful mushrooms you’d pay through your nose for in England in a wonderfully germanic cream sauce.  The potatoes weren’t just plain roast tatties but they also had delicious smoked bacon pieces and were sort of crushed together in a way I’ll never be able to create.  Hearty and simple food but utterly satisfying in every way.  For dessert I had an ice cream which included plum ice cream, which I really must try with some of the plums as it was very nice.  All of this was washed down with a local rosé wine from a vinyard about a mile away, bliss! 

Meatballs!

I love the Alsace region of France.  I love France but it’s also so very German, the perfect melding of the two.  We traveled up the Route des Vins through dozens of picture perfect villages passing caves left right and centre.  It was harvest time and driving through some of the towns with the windows down was a positively intoxicating experience and the scent of wine making wafted in.  We followed more than our fair share of tractors pulling along trains of buckets filled with grapes.  I managed to find myself a kugelhopf mould too.  You see a lot of these moulds sold as decorative items but I wanted one I could actually cook with and I managed to grab myself a bargain at 9€80.  I’ll be experimenting with that as soon as I’ve tempered it.  I’ve got to get some Alsacian wine glasses next time I go back, I love the green stems on them. 

Vines

Other foodie highlights of the trip included another thrown together picnic in idylic surroundings, the fresh peaches that are always 10 times better over there than here and the patisseries, without which I would never have gained half as much holiday weight!  

Tarte Framboises

Leave a comment

Filed under Uncategorized

Plum Jam Recipe and Holiday Eating!

I was trying to post this recipe the night before I left to go on holiday but the internet had a massive panic attack or something and everything went horribly wrong.  As I type I’m sitting in a hotel in Colmar in the Alsace region of France.  We stayed last night in St. Quentin in the north of France and tomorrow we drive through Switzerland and into northern Italy where we will be staying for a week.  I’m already in food heaven!  Last night for dinner I had Flammekueche, sort of a pizza but with creme fraiche instead of tomato.

Sitting in St Quentin town square eating dinner.

For lunch today we hit the supermarket and grabbed bread, pate, cheeses, cold meat, crisps and a tarte aux pommes and sat by the side of a canal on a blanket, simple and basic but blissful!  YUM! 
Hasty Picnic
The recipe I was actually trying to post was for the plum jam I made the day before we left.  We have had a glut of plums and I was looking for something to do with them that would last until we came back from holiday so Jam it was!
Plums
– First make sure you have plums, sugar and jars/lids/wax disks and plastic covers. 
– Place the jam jars, lids removed, in the oven at gas mark 1.  Put the lids in boiling water to sterilise. 
– Stone your plums and weigh how much you have.  Remember this number. 
– Put the plums in a large heavy bottomed pan with a little over 150ml water per kg of plums. 
– Bring to the boil then simmer for 30 minutes until the fruit is soft.
– Weigh out the same amount of granulated sugar as you had plums. 
– Add this to the plums along with a knob of butter. 
– Bring to a rapid boil and leave at a high heat for 10 minutes or until the setting point is reached. 
– To test place a little jam on a cold plate and push it with yout finger.  If it wrinkles as you push it it’s ready. 
– Add another knob of butter to dissolve the scum.  Remove any remaining scum with a slotted spoon. 
– Remove the jam jars from the oven and carefully ladle the jam into the jars. 
– Seal while hot then leave to cool and store. 

Leave a comment

Filed under Jams and Preserves, Moderately easy

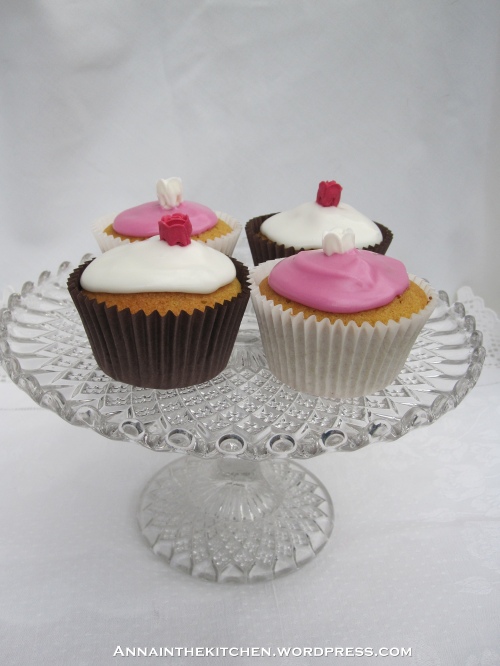
Cupcakes 2

I received a cupcake cookbook I’d ordered today, Cupcakes by Susannah Blake, which was very inspirational.  It’s a lovely little book, it has a decent basic recipe and then lots of variations in both flavours and toppings.  Not only is there the simple recipe but lots of other recipes like gluten and dairy free or polenta based.  All in all a good book.  However, there is no way that I can see that her 115g recipe will make 12 muffin tin cupcakes unless the cases are very short.  My basic recipe uses 200g and usually makes 13, I like to ‘test’ the extra one to ensure quality control!  With a 12 hole muffin pan I usually put a muffin case in a ramekin dish et voila, an extra space!  May be I’m just using extra large paper cases but either way I ignored her recipe today and went with my own. 

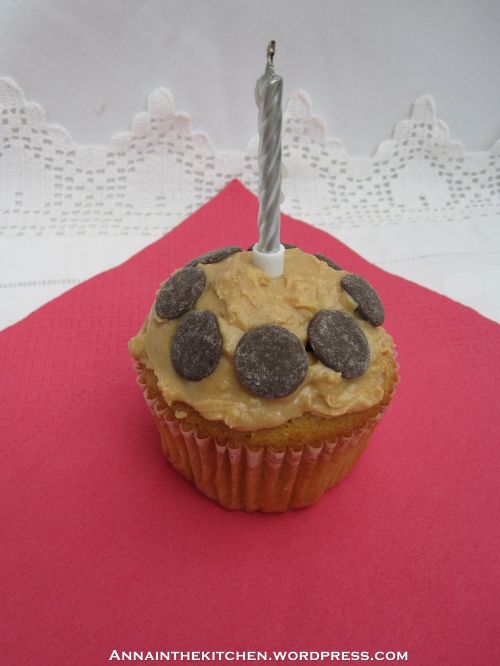
The reason I was making cupcakes was because it was the dog’s first birthday.  Don’t worry, I’m not really that kind of person but it seemed a good excuse for cake!  He has a very sweet tooth so he got given the 13th cake with peanut butter as icing and chocolate dog treats to decorate.  Naturally he got a candle too but he wasn’t allowed to eat that!

Cupcakes

Makes 13

200g butter, softened
200g golden caster sugar
4 eggs, beaten
the seeds from 1/2 a vanilla pod*
200g flour
2 tbsp milk
150g icing sugar
2 tbsp lemon juice
natural pink food colouring
decorations

– Heat the oven to gas mark 5 and line a muffin tin with paper cases and a ramekin with one case. 
– Cream together the butter and the sugar until light and fluffy.  If your sugar is lumpy use the back of a spoon to break it up before adding the butter to make things easier for yourself. 
– In a separate jug beat the eggs and vanilla seeds. 
– Add the egg to the mixture a bit at a time beating thoroughly between each addition.  If it curdles then add a tbsp of the flour and carry on. 
– Add the flour and fold it in. 
– When thoroughly combined stir through the milk. 
– Divide the mixture evenly between the cases.  I use an ice cream scoop, one of the ones that you squeeze and a little metal bit runs round the inside, to measure out the mixture. 
– Bake for 18-20 minutes then remove and test with a skewer, the skewer should come out clean. 
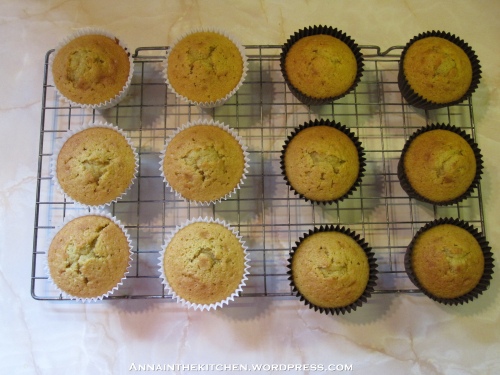
– Place on a wire rack to cool completely before icing. 

Cooling Cupcakes

– To make the icing mix the icing sugar and lemon juice together.  It should be spoonable but not too runny.  If necessary add more lemon juice a few drops at a time, it’s better to add a little at a time as you can always add more but you can’t take it out! 
– Divide the icing into two and add a cap full of food colouring to one bowl, Mix well. 
– Place a heaped teaspoon of icing on each cake and use the back of the spoon to gently guide it.  Place your decoration of choice on top immediately. 

* To get the seeds out of the vanilla pod carefully split it lengthways and then use the back of the knife to scrape along gathering up the seeds as it goes.  #

The dog’s birthday cake:
Frodo's Birthday Cake

2 Comments

Filed under Cupcakes and Muffins, Easy

Banoffee Tiramisu Charlotte Recipe

This came about because I’d seen a picture of a Strawberry Charlotte and thought it looked cool.  I was also thinking of trying out a tiramisu recipe and I had bananas and dulche de leche that needed to be used up before I go on holiday.  So I combined them all!  I thought that it might be like the Summer Pudding, looks easy, really not, but it turned out to be very simple.  A little fiddly in places but other than that it was much better than I had hoped.  Then it came to whether or not it would actually have worked or not.  Would mixeing the three things be too much of a good thing or a delicious dessert invention?  I am very happy to announce that it is definitely the latter.  It looks impressive and tasted great too!

Banoffee Tiramisu Charlotte

Serves 8

1 pack of sponge fingers
250ml whipping cream
250g marscapone
1/2 tsp vanilla essence
3 tbsp icing sugar
2 tbsp Kahlua
1 can Carnation Caramel or Dulce de Leche
3 bananas
6 squares plain chocolate. 

For the syrup:
1 tbsp instant coffee
1 tbsp sugar
1/2 cup boiling water
1 tbsp Kahlua

– Line a 7″ loose bottomed cake tin with baking paper. 
– Mix all of the syrup ingredients in a small bowl and set aside to cool.
– Whip the cream in a bowl. 
– Mix together the marscapone, vanilla, icing sugar and Kahlua in a large bowl. 
– Gradually add the whipped cream to this mix. 
– Carefully cut the very end off enough sponge fingers to line the cake tin so you have a straight edge. 
– Carefully place the sponge fingers around the circumference of the tin. 
– With the rest of your sponge fingers dip them in the syrup for 1 second and then line the bottom of the tin with them. 
– Spoon over half of your dulche de leche. 
– Place a layer of banana slices on top of that. 
– Spoon the cream over the bananas then smooth down with the back of a spoon. 
– Grate chocolate over the cream.
– Again dip and place the sponge fingers on top of the cream. 
– Add the rest of the dulche de leche. 
– More banana slices. 
– The rest of the cream. 
– Smooth down the cream with the back of the spoon and then grate chocolate over the top. 
– Place in the fridge overnight.   
– To remove from the tin find a small bowl or large glass that is taller than the cake tin.  Place the tin on top of this and gently push down on the ring being careful not to knock the fingers. 
– Pick up the base plate and use a pallate knife to gently slide the dessert on to the serving plate.  I say just leave the baking paper on the bottom and don’t tempt fate but if you’re feeling brave you can try to separate the paper and pudding in the same manoeuver.   
– Enjoy!

Leave a comment

Filed under Desserts, Moderately easy

Tollhouse Cookies Recipe

Or just Chocolate Chip Cookies if you like!  I have been cooking these for years.  They were probably the first cookie recipe I tried and I have never needed to look elsewhere.  I’ve tweaked the recipe here and there and made several variations over the years but simple is best I think.  These are best enjoyed warm with a cold glass of milk.  They may be good on their own but just wait til you try them with milk!  They have the perfect texture somehow managing to be crunchy yet slightly chewy too and if you can restrain yourself they keep quite well too. 

Tollhouse Cookies

Makes 24

115g butter softened*
50g granulated sugar
75g dark brown sugar
1 egg
1/2 tsp vanilla essence
125g plain flour
1/2 tsp bicarbonate of soda
a pinch of salt
180g chocolate chips (or whatever weight your bag is. I used Cadburys Chunks which weigh 180g If using a small bag, say 100g, use 2 bags.)

– Heat the oven to gas mark 4 and grease 3 baking trays. 
– Cream together the butter and both sugars until it is light, fluffy and there are absolutely no lumps. 
– Beat together the egg and vanilla and then gradually add this to the butter and sugar mix, mixing thoroughly between additions.  If it curdles (goes a bit weird and lumpy looking) just add a tbsp of the flour and continue to mix. 
– Sift in the flour, bicarbonate of soda and salt and mix well.  It may look as if it will never cream together if you’re doing it by hand rather than in a mixer as I do but keep mixing and it will come together nicely. 
– Add the chocolate chips  and stir through until evenly distributed. 
– Place heaped teaspoonfuls of the mixture on the prepared trays leaving 2 inches between each mound.  These cookies will spread out so do leave the space. 
– Bake for 15 minutes until lightly browned. 
– Remove from the oven and leave on the tray for a minute before removing with a flat knife and transfering to a wire rack to cook to eating temperature. 

* When baking always use room temperature ingredients, if they’re coming from the fridge then take them out at least 30 minutes in advance.  If your butter still isn’t soft enough to cream I find that 10 seconds in the microwave does the trick but no longer!

4 Comments

Filed under Cookies and Biscuits, Easy

Tiramisu Recipe

I actually only made two of these with leftovers from tomorrow’s dessert, which I will be posting tomorrow, so I’m making a rough guess at quantities for this.  I love Tiramisu, even though it took me a long time to come round to coffee as a flavour, now I’m a caffeine addict!  I do like to splash out on really good quality Amaretti, preferably from Italy, I think it makes a big difference. 

Tiramisu

Makes 6

250ml whipping cream
250g marscapone
1/2 tsp vanilla essence
3 tbsp icing sugar
2 tbsp Kahlua
Approximately 60 Amaretti biscuits
6 squares plain chocolate. 

For the syrup:
1 tbsp instant coffee
1 tbsp sugar
1/2 cup boiling water
1 tbsp Kahlua

– Whip the cream in a medium sized bowl. 
– In a small bowl combine all of the syrup ingredients and stir well until everything is dissolved. 
– In another bowl mix together the marscapone, vanilla, icing sugar, kahlua and 3 tbsp of the syrup. 
– Mix together the cream and marscapone mix a bit at a time until fully combined. 
– Dip each Amaretti in the syrup for a second and put in a layer at the bottom of your serving glass.  Pour 1 tsp of syrup over them. 
– Spoon the cream mixture on top and smooth down. 
– Grate the chocolate over the top of the cream. 
– Once again dip the biscuits and arrange on top of the cream then drizzle 1 tsp syrup on top.
– Cover with cream again and then grate chocolate over the top. 
– Chill for at least 3 hours. 
If you like serve with a strawberry half or a raspberry for a shot of colour. 

Tiramisu

Leave a comment

Filed under Desserts, Easy

Okonomiyaki Recipe

The Japanese theme continues tonight with Okonomiyaki (お好み焼き).  Often called Japanese Pancakes or Pizza, I can see where they’re coming from but it’s more of an interesting hybrid.  I used to eat this a lot when I lived in Japan the first time.  There was a tiny little restaurant that did great Okonomiyaki and Monja, something I’m still looking for a good recipe for, in my neighbourhood.  I never had it the second time I lived there and having tasted it again tonight I really don’t know why, it’s delicious!

My mum has been calling this ‘Economyaki’ and she’s kind of right.  It is dirt cheap to make and I usually have everything in the cupboard.  If you don’t have some of the specialist stuff like bonito flakes then don’t worry about it, it tastes equally good just with mayo and ketchup!  We have an electric pancake maker that goes on the table top so I use this to cook them in front of everyone, if you don’t have something similar just use a nonstick frying pan and serve it from the hob. 

I am so happy that this turned out so well, I was really afraid it wouldn’t taste like I remembered or that my family would hate it.  Luckily it was fantastic and even my little sister, who hates cabbage with a passion, said it was delicious, she had hers with ketchup and mayo because she didn’t think she would like the sauce.  She’s actually kinda mad that I made her like something with cabbage in it, oops!

Okonomiyaki

Makes 1 large or 4 individual 

For the ‘pancake’:
3/4 cup dashi (or water)
1 cup plain flour
1/4 head of white cabbage, thinly sliced
1 egg
Your choice of toppings, I like shrimp, cooked bacon bits and may be some spring onion. 

For the sauce:
1/4 cup ketchup
2 tbsp worcestershire sauce
1/4 tsp dijon mustard
2 tbsp sake
2 tsp soy sauce

– In a small pan mix together the sauce ingredients and heat until boiling.  Mix well so that everything is combined and smooth then allow to cool. 
– In a medium bowl mix together the ingredients for the ‘pancake’ with a spoon until well combined.  If preparing at the table I like to put in the dashi followed by the flour, followed by the cabbage, break the egg on top then arrange your toppings on the top. 

Ready to go!

– Spoon out the mixture onto your cooking surface in the servings you want, shape lightly into rounds and then leave for a few minutes until the base it lightly browned and you can see the change in texture about half way up the ‘pancake’. 
– Flip it over using two spatulas.  Be careful though, it is never as easy as you think it will be! 
– Leave it for another couple of minutes until that side is browned too. 
– Serve with mayonnaise, okonomiyaki sauce and bonito flakes.

Leave a comment

Filed under Easy, Japanese, Mains

Hiyashi Chuka

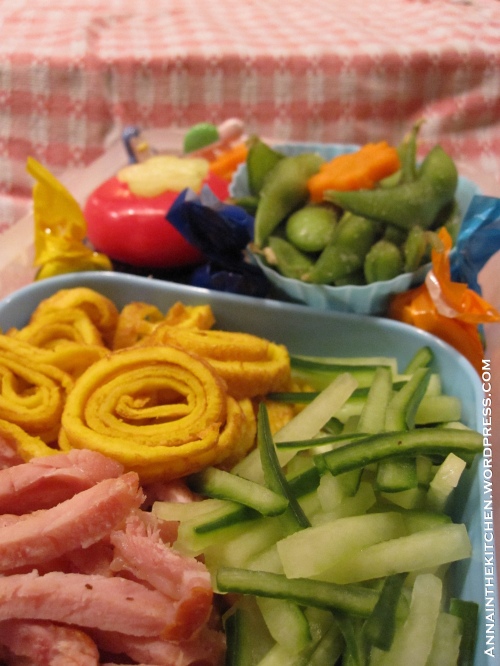
I make Japanese style lunch boxes, bento, for my mum when she’s at work.  A lot of the time they’re just leftovers dressed up prettily or made in minature.  I use a lot of western foods too.  Since bento means lunch in a box it all works.  Sometimes I get the urge to go very Japanese and I’m in that phase right now so expect a few Japanese recipes from me in the next week.  Tomorrow’s lunch contains hiyashi chuka, which is a sort of noodle salad.  It makes a great light lunch and is a little bit different, although not for the Japanese who would probably regard it as a tuna mayo sandwich type of lunch, ie. normal and boring!

Hiyashi Chuka Bento

For the egg sheet:
1 egg
1 tsp sugar
1/2 tsp dashi powder if you have it
1 tsp corn flour
a splash of cold water. 

1 nest of egg noodles per person
1 slice of ham per person
about 1″ of cucumber per person
Dipping Sauce (I use TsuYu, which I get in a big bottle from the Oriental Supermarket.  You can find a recipe to make a good dipping sauce here.) 

– Cook the noodles according to the packet instructions.  Set aside to cool when done.
– Mix all of the ingredients for the egg sheet together well and heat a frying pan with a little oil. 
– Pour the egg mixture into the pan and swirl around so it is evenly covering the pan like a pancake. 
– Cook until the egg is solid then peel up off the pan and roll the egg sheet up swiss roll style. 
– Thinly slice the egg sheet, ham and cucumber. 
– Place the noodles on the bottom of each plate or bowl, then arrange the ham, egg and cucumber on the top. 
– Pour over the dipping sauce and eat!

Leave a comment

Filed under Easy, Japanese, Mains

Lemon Posset Recipe

As I type this I am so full I may actually rupture something.  I can feel my arteries clogging by the second!  My sister came out of hospital early today and so we had fish and chips for dinner as that was what she wanted.  I love fish an chips!  I’m lucky in that there are several excellent chippies in the area when the urge does strike. 
However, before I knew we were having fish and chips I had prepared dessert.  As you will see from the ingredients it’s basically cream.  My brain must have been elsewhere this afternoon because I put it in the big serving glasses.  Big mistake!  It is lovely and light while you’re eating, an absolute dream, but once you’ve finished the richness hits you right in the stomach!  Take heed and don’t put it in anything bigger than a ramekin to serve.
Lemon Posset
Makes 4 large ramekins, 6 smaller (I made 3 portions!)
600ml double cream
140g caster sugar
2 lemons
– Zest the lemons and juice them, straining out the pips and pulp. 
– Put the cream and sugar in a heavy bottomed pan and bring to a simmer but do not let it boil.  (The cream will change colour and little bubbles will rise.)  Cook it for 3 minutes at this stage, stirring gently. 
–  Remove the pan from the heat and add the lemon juice.  Use a whisk to combine it thoroughly.*  
– Allow to cool slightly then pour into individual serving glasses or ramekins. 
– Sprinkle the tops with lemon zest.
– Chill for at least 3 hours or overnight.

*If you by any chance forget to juice your lemons first and just juice them straight into the pan, pips and all, like I did then just pour it through a sieve into a jug and then pour straight from the jug into the serving dishes, easy!

Leave a comment

Filed under Desserts, Easy

Banoffee Meringue Recipe

In my family we don’t make banoffee pie.  We make it on a meringue base.  It adds a whole extra dimension, not only do you have the banoffee flavours but the crisp, chewy meringue really adds something and the caramel melds beautifully with it.   Normally I would make this in a pavlova sized meringue base but today I cheated and bought individual meringue nests on the way back from the hospital for a dessert treat. 

Banoffee Meringue

Makes 1 individual serving, just multiply by however many people you want to feed or make one big one. 

1 meringue nest
2 tsp Carnation Caramel*
1/2 a banana
2 tsp whipped cream
chocolate sprinkles

– Spoon the caramel into the base of the meringue, spreading it out with the back of the spoon. 
– Place banana slices on top of the caramel. 
– Dollop the cream on top and lightly shape with the back of the spoon. 
– Dust with chocolate sprinkles. 
– Place one banana slice on top and a pair of mint leaves if you like. 
– You can assemble these to serve immediately or do them in advance and put on a plate in the fridge for a few hours.  If left overnight the meringue will go a bit soft but that too is enjoyable!

* You can make your own caramel by putting a tin of condensed milk in a pan of boiling water and simmering it for 3 hours, which I have done on occasion, or you can just buy a tin of Carnation Caramel, simples!

If you want to make your own meringue base then you can use this recipe here but instead of piping it out into individual rounds just use a large spoon to shape it into one big meringue and bake for about  2 hours on Gas mark 1.

Leave a comment

Filed under Desserts, Easy